Introduction
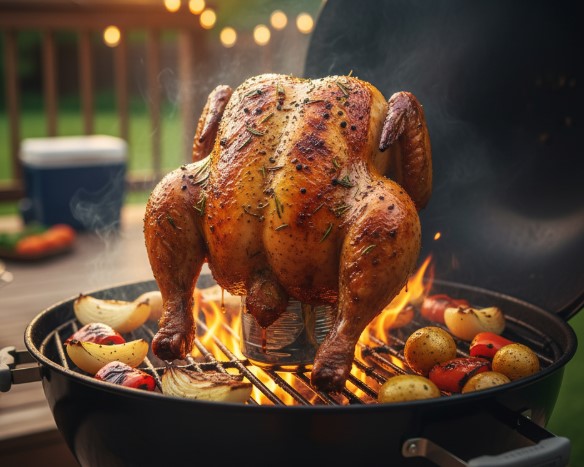
Beer Can Chicken, often called “Chicken on a Throne,” is one of those recipes that perfectly blends fun cooking with incredible flavor. The method is simple yet brilliant: a whole chicken is set upright on a partially filled beer can and roasted either on the grill or in the oven. As the beer gently steams from inside the bird, it infuses the meat with moisture and subtle flavor, while the outside crisps up beautifully with a golden-brown finish.
What makes this dish special is not just the taste, but also the experience. Watching a chicken perched on a beer can roasting to perfection is a conversation starter and a true showpiece for gatherings. It’s rustic, juicy, smoky, and full of character—exactly what comfort food should be. Whether you’re hosting a backyard barbecue, a game-day feast, or simply want to try something new in the kitchen, Beer Can Chicken is a recipe that delivers both fun and flavor in every bite.
Why I Love This Recipe
I love Beer Can Chicken because it’s easy yet impressive. You don’t need a fancy rotisserie oven to achieve tender, juicy chicken with crispy skin—the beer can does the work for you. It’s also incredibly versatile: you can change the spices, experiment with different beer varieties, or even swap the beer for soda or broth.
I also love that it turns into a centerpiece dish. Imagine pulling a beautifully browned chicken off the grill, standing tall and golden, with aromas of garlic, paprika, and smoky beer filling the air—it’s the kind of food that excites both the cook and the guests.
Plus, it’s a recipe that makes cooking fun. Standing the chicken on a beer can feels quirky and unconventional, but the results prove just how practical it really is.
Why It’s a Must-Try Dish
Beer Can Chicken isn’t just a quirky cooking method—it’s a game-changer for anyone who loves juicy, flavorful poultry. What makes it a must-try is the clever use of the beer can itself: as the chicken roasts upright, the beer inside slowly steams, keeping the meat exceptionally moist while adding a subtle malty aroma. Meanwhile, the skin crisps up beautifully, giving you the perfect contrast of textures—crispy on the outside, tender and succulent on the inside.
Another reason it stands out is its show-stopping presentation. Imagine bringing a golden-brown chicken balanced on a beer can straight from the grill or oven—it’s guaranteed to wow your family and guests. It’s also highly versatile: you can change the type of beer for different flavors, use a dry rub or marinade of your choice, and pair it with just about any side dish, from roasted vegetables to cornbread.
Beer Can Chicken is more than just food; it’s an experience. It turns cooking into something fun, creative, and a little playful—while still delivering restaurant-quality results. If you’ve never tried it before, this dish will completely change the way you think about roasting chicken.
Recipe Details
- Preparation Time: 15 minutes
- Cooking Time: 1 hour 15 minutes – 1 hour 30 minutes (depending on chicken size and grill/oven temperature)
- Total Time: 1 hour 45 minutes
- Servings: 4–6 people
- Calories: ~350–400 per serving (varies based on skin and serving size)
- Course: Main Course
- Cuisine: American, Barbecue
Ingredients
- 1 whole chicken (about 4–5 lbs)
- 2 tablespoons olive oil (or melted butter)
- 2 tablespoons paprika (smoked or sweet)
- 1 tablespoon garlic powder
- 1 tablespoon onion powder
- 1 teaspoon dried thyme (or rosemary)
- 1 teaspoon chili powder (optional, for a little heat)
- 1 teaspoon salt
- 1 teaspoon black pepper
- 1 can of beer (12 oz; lager or pale ale works best)
- 3–4 garlic cloves, lightly crushed (optional, for inside the beer can)
- Fresh herbs like thyme or rosemary sprigs (optional, for inside the beer can)
Cooking Directions
Step-by-Step Preparation Method
- Prepare the Chicken:
- Rinse the chicken and pat it completely dry with paper towels (dry skin ensures crispiness).
- Remove giblets if included.
- Season the Chicken:
- Rub olive oil or melted butter all over the chicken.
- Mix paprika, garlic powder, onion powder, thyme, chili powder, salt, and black pepper in a small bowl.
- Generously season the chicken on the outside and inside the cavity.
- Prepare the Beer Can:
- Open the beer and pour out (or drink!) about half, leaving the can half-full.
- If desired, add garlic cloves or fresh herbs to the beer for extra flavor.
- Mount the Chicken:
- Carefully place the cavity of the chicken over the open beer can so the chicken is standing upright.
- Tuck the wings behind the back and stabilize the chicken with the drumsticks.
- Cooking Methods:
- Grill Method (Preferred):
- Preheat grill to medium-high (375–400°F / 190–200°C).
- Place the chicken upright on indirect heat. Close the lid and cook for 1–1.5 hours until internal temperature reaches 165°F (74°C) in the thickest part of the thigh.
- Oven Method:
- Preheat oven to 375°F (190°C).
- Place chicken standing on a baking sheet or roasting pan to catch drips.
- Roast for 1–1.5 hours until cooked through.
- Grill Method (Preferred):
- Rest the Chicken:
- Carefully remove the chicken and beer can (use tongs or oven mitts—it will be very hot).
- Let rest for 10 minutes before carving.
How to Serve
- Carve the chicken into portions (breast, thighs, wings, drumsticks).
- Serve with roasted vegetables, mashed potatoes, coleslaw, or cornbread.
- Garnish with fresh herbs for a finishing touch.
Recipe Tips
- Always cook the chicken over indirect heat if using a grill—direct flames can burn the skin.
- A chicken stand made for Beer Can Chicken adds stability and safety.
- Use a mild beer (lager or pale ale). Dark beers can sometimes overpower the flavor.
- For extra crispy skin, rub baking powder mixed with salt on the chicken skin before cooking.
Variations
- Citrus Beer Can Chicken: Add lemon or lime zest to the spice rub for freshness.
- Spicy Version: Use cayenne pepper or hot chili powder in the seasoning.
- Non-Alcoholic: Replace beer with chicken broth, ginger ale, or soda.
- Herb Lovers: Stuff fresh rosemary, thyme, or sage into the beer can for herbal steam.
Freezing and Storage
- Refrigeration: Store leftovers in an airtight container for 3–4 days.
- Freezing: Shredded chicken can be frozen for up to 3 months. Use in soups, tacos, or casseroles.
- Reheating: Reheat gently in the oven at 325°F (160°C) until warmed through.
Special Equipment Needed
- Grill or oven
- Beer can chicken stand (optional, but recommended for stability)
- Meat thermometer
- Roasting pan (for oven method)
Conclusion
Beer Can Chicken is the perfect balance of fun, flavor, and simplicity. It turns an ordinary roast chicken into a showpiece meal with juicy meat and crispy skin, all infused with aromatic steam. Whether you’re grilling in the backyard or roasting in the oven, this recipe is a must-try for chicken lovers. It’s versatile, reliable, and always a crowd-pleaser—making it a recipe you’ll want to return to again and again.

Beer Can Chicken Recipe
Description
Beer Can Chicken, sometimes called “Chicken on a Throne,” is a fun, flavorful, and impressive way to roast a whole chicken. The concept is simple yet genius: a can of beer is partially filled and placed inside the chicken cavity, then the chicken is roasted upright.
Ingredients
Instructions
-
Prepare the Chicken: Rinse the chicken and pat it completely dry with paper towels (dry skin ensures crispiness). Remove giblets if included.
-
Season the Chicken: Rub olive oil or melted butter all over the chicken. Mix paprika, garlic powder, onion powder, thyme, chili powder, salt, and black pepper in a small bowl. Generously season the chicken on the outside and inside the cavity.
-
Prepare the Beer Can: Open the beer and pour out (or drink!) about half, leaving the can half-full. If desired, add garlic cloves or fresh herbs to the beer for extra flavor.
-
Mount the Chicken: Carefully place the cavity of the chicken over the open beer can so the chicken is standing upright. Tuck the wings behind the back and stabilize the chicken with the drumsticks.
-
Cooking Methods: Grill Method (Preferred) Preheat grill to medium-high (375–400°F / 190–200°C). Place the chicken upright on indirect heat. Close the lid and cook for 1–1.5 hours until internal temperature reaches 165°F (74°C) in the thickest part of the thigh.
-
Oven Method: Preheat oven to 375°F (190°C). Place chicken standing on a baking sheet or roasting pan to catch drips. Roast for 1–1.5 hours until cooked through.
-
Rest the Chicken: Carefully remove the chicken and beer can (use tongs or oven mitts—it will be very hot). Let rest for 10 minutes before carving.